
Getting Started with Cloud Tape Library
v24.06.28
Create Access and Secret Keys 10
Write Data to a Cloud Tape Library 11
Browse Data in the Cloud Tape Library 13
Read Data from a Cloud Tape Library 14
Create an account
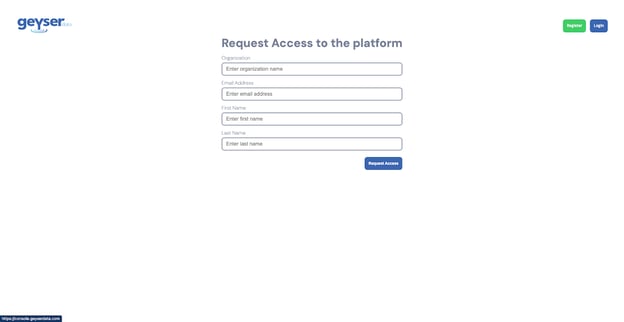
- Go to https://console.geyserdata.com
- Click the Register button on the top right of the registration form
- Enter you Organization name, email address, First Name and Last Name
- Click Request Access (you should get a thank you screen like below)
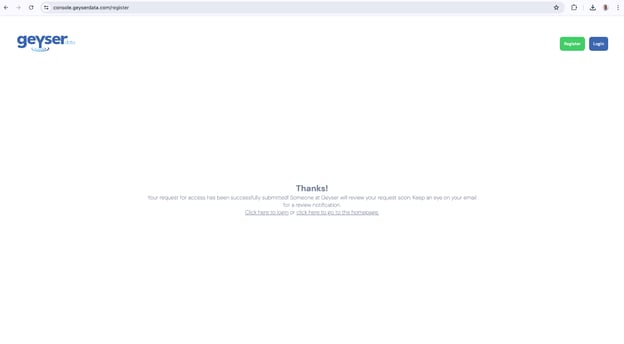
Every account needs to be approved by Geyser Data. This may take up to 24 hours.
Once your account is approved, you should get a welcome email from Geyser Data. If you don’t get the Welcome email in 24 hours please check your spam folder or send an email to support@geyserdata.com
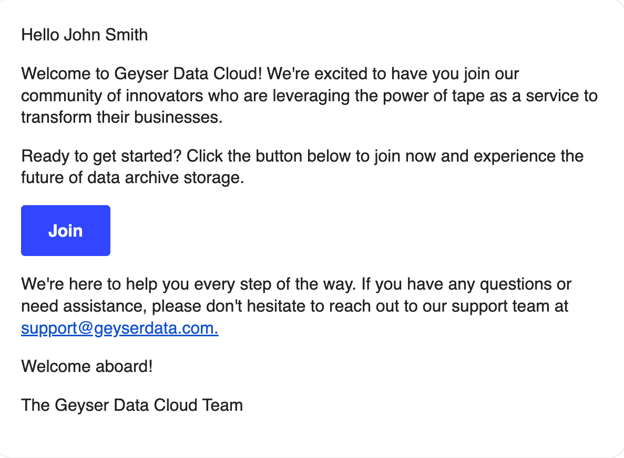
Once you receive the Welcome email, click on the Join button; this will open the Create Password screen.
Insert a password with between 8 to 100 characters and this will redirect you to the Login screen
Login to your account
- Go to https://console.geyserdata.com
- Enter your email address and password
- You will get to the Verify screen
- You should have received an email with a verification code
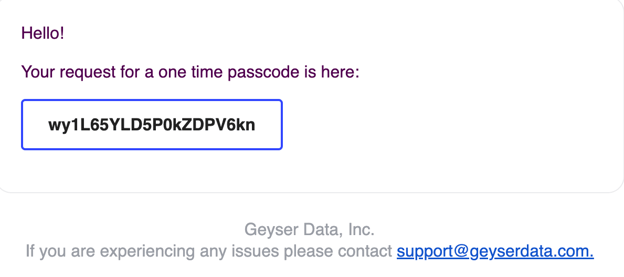
- Copy the verification code in the email and paste into the Verify screen

- Click Verify (the two factor auth verification step happens for every login to provide additional security to your account)
- Once you verify you are logged in into the dashboard screen, you can begin provisioning your tape library.
Create a Cloud Tape Library
- Once you have logged in, click on the Create Cloud Tape Library button on the left hand panel, this will redirect you to the Create Cloud Tape Library screen
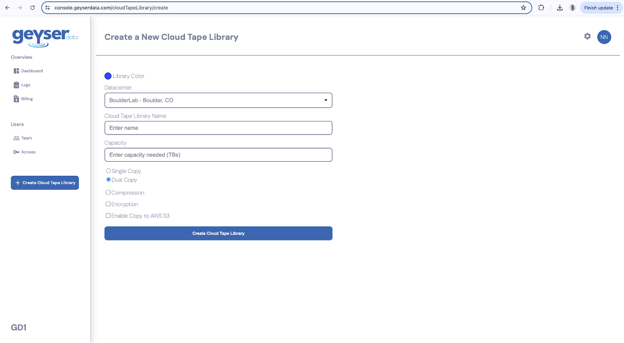
- Choose the color for your Cloud Tape Library. (This is to help you identify them easier on the dashboard screen when you have multiple Cloud Tape Libraries).
- Choose the Datacenter (for POCs choose BoulderLab - Boulder, CO
- Enter the name of the Cloud Tape Library
- Choose between Single Copy or Dual Copy tapes for your data. (For production environments we recommend you select dual copies, that means we will always write the data onto two tapes)
- Optionally choose Compression, Encryption and Enable Copy to AWS S3 (all of these are optional features that will add to the cost per Tape allocated).
- Click Create Cloud Tape Library button
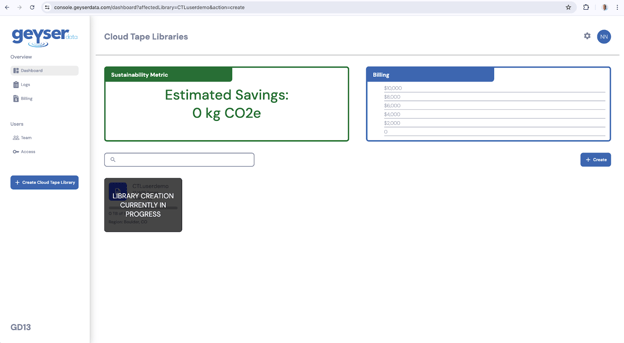
- At this point you will see the dashboard screen with the Cloud Tape Library creation in progress. It will take less than a minute and the cloud tape library creation will be done.
View the Cloud Tape Library
- Once the Cloud Tape Library is created it will show up in the Dashboard screen as a square with the main parameters you selected.
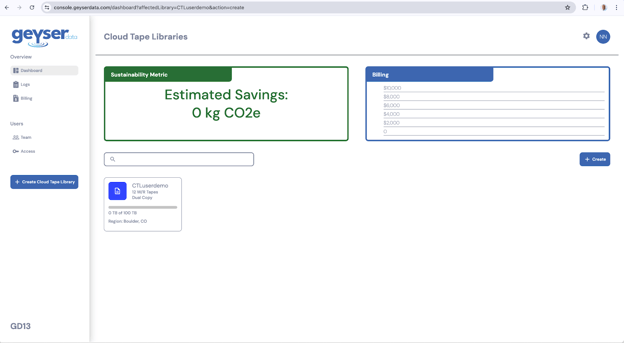
- Click on the Cloud Tape Library tile
- You will be presented with the View Cloud Tape Library screen
- The View Cloud Tape Library will show the different parameters of the Cloud Tape Library, including the images of the Tape cartridges
- The s3Url is the s3 endpoint to redirect your S3 commands to using a CLI/API or your applications for storing your data
- The first cloud tape library that you create will have a red banner indicating that you don’t have Access/secret keys generated for this library yet.
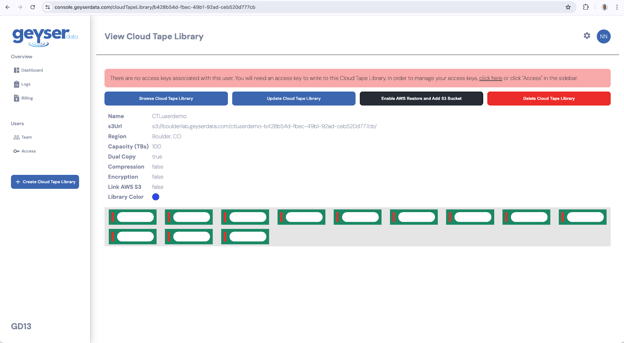
In order to create your Keys, click on the link click here in the red banner, this will redirect you to the Access menus or alternatively click on the Access key button in the left hand pane as described in the next section.
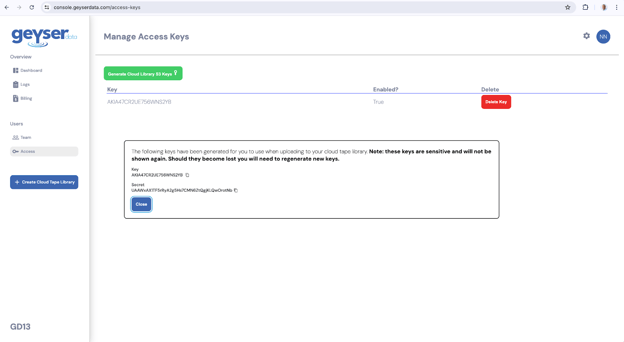
Create Access and Secret Keys
- In order to generate the keys go to the Access menu and you will see the Manage Access Keys screen
- Click the Generate Cloud Library S3 keys button
- This will automatically generate access and secret keys
- The Keys will be displayed, copy and paste the Key and Secret into a text file or password safe before closing this dialog box.
Note: You will not be able retrieve these later only generate new ones
- At this point you are ready to start writing data into the cloud tape library
Write Data to a Cloud Tape Library
The Cloud Tape Library supports standard S3 Glacier protocols. Depending on the client you use, you will need to provide the endpoint url and bucket name that you have in the View Cloud Tape Library screen and the Access and Secret keys you generated in the Access menu
As a model example, below is a simple Python version 3 script that you can use to write a single file to your cloud tape library.
In order to use this script you need to have Python version 3 installed and you need to install the AWS boto3 library with the command:
pip install boto3
To use this script you call it from the cli using:
python upload_file_to_s3.py <filename>
Where file name is the file you want to upload to your Cloud Tape Library
Copy the script below and paste it on a file upload_file_to_s3.py
The content of the upload_to_s3.py is below.
Change the value of the following variables to match your own values:
bucket_name, endpoint_url, access_key, secret_key
import boto3 # type: ignore
import sys
import os
def upload_file_to_s3(filename,bucket_name, endpoint_url, access_key, secret_key):
# Create a session with the specified parameters
session = boto3.session.Session()
# Create an S3 client with custom configurations
s3_client = session.client(
service_name='s3',
aws_access_key_id=access_key,
aws_secret_access_key=secret_key,
endpoint_url=endpoint_url,
verify=False # Ignore SSL certificates
)
# Get the basename of the file to use as the key
key = os.path.basename(filename)
try:
# Upload the file
s3_client.upload_file(Filename=filename, Bucket=bucket_name, Key=key)
print(f"File '{filename}' uploaded to bucket '{bucket_name}' successfully.")
except Exception as e:
print(f"Error uploading file: {e}")
if __name__ == "__main__":
if len(sys.argv) != 2:
print("Usage: python3 upload_file_to_s3.py <filename>")
sys.exit(1)
# Variables
filename = sys.argv[1]
bucket_name = 'ctluserdemo-b428b54d-fbec-49b1-92ad-ceb520d777cb'
endpoint_url = 'https://boulderlab.geyserdata.com'
access_key = 'AKIA47CR2UE7WGLJIRVP'
secret_key = 'qN8cbYbqf/bUMYIn4iZd3LKFs0Z8hLIrBWGaejW3'
upload_file_to_s3(filename, bucket_name, endpoint_url, access_key, secret_key)
For example in order to upload the file test.bin run:
python3 upload_file_to_s3.py test.bin
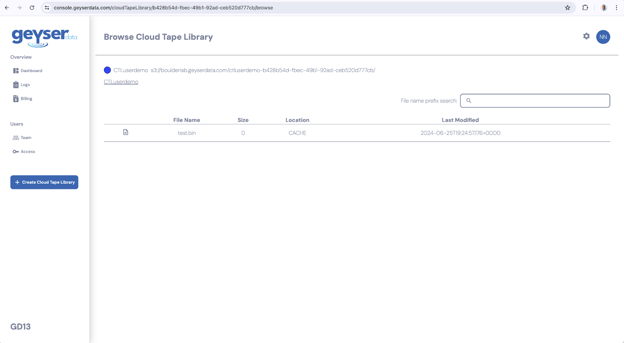
Browse Data in the Cloud Tape Library
In the cloud tape library you can browse the files that are stored there.
- Go to the Dashboard
- Click in your Cloud Tape Library, you will get to the View Cloud Tape Library
- Click the button Browser Cloud Tape Library
- You will see the files uploaded to your cloud tape library
Read Data from a Cloud Tape Library
The Cloud Tape Library supports standard S3 Glacier protocols. Depending on the client you use, you will need to provide the endpoint url and bucket name that you have in the View Cloud Tape Library screen and the Access and Secret keys you generated in the Access menu.
As a model example, below is a simple Python version 3 script that you can use to read a single file from your cloud tape library.
In order to use this script you need to have python installed and you need to install the AWS boto3 library with the command:
pip install boto3
To use this script you can call it with the cli using:
python download_file_from_s3.py <filename> <directory_path>
Where file name is the file you want to download from your Cloud Tape Library
Copy the script below and paste it on a file download_file_from_s3.py
The content of the upload_to_s3.py is below.
Change the value of the following variables to match your own values:
bucket_name, endpoint_url, access_key, secret_key
import boto3 # type: ignore
import sys
import os
from botocore.config import Config # type: ignore
def download_file_from_s3(filename, bucket_name, endpoint_url, access_key, secret_key, download_path):
# Create a session with the specified parameters
session = boto3.session.Session()
# Create a configuration with a long timeout
config = Config(
connect_timeout=300, # 5 minutes
read_timeout=3600 # 1 hour
)
# Create an S3 client with custom configurations
s3_client = session.client(
service_name='s3',
aws_access_key_id=access_key,
aws_secret_access_key=secret_key,
endpoint_url=endpoint_url,
verify=False, # Ignore SSL certificates
config=config
)
try:
# Download the file
s3_client.download_file(Bucket=bucket_name, Key=filename, Filename=os.path.join(download_path, filename))
print(f"File '{filename}' downloaded from bucket '{bucket_name}' successfully.")
except Exception as e:
print(f"Error downloading file {filename} from {bucket_name}: {e}")
if __name__ == "__main__":
if len(sys.argv) != 3:
print("Usage: python download_file_from_s3.py <filename> <download_path>")
sys.exit(1)
filename = sys.argv[1]
download_path = sys.argv[2]
bucket_name = 'ctluserdemo-b428b54d-fbec-49b1-92ad-ceb520d777cb'
endpoint_url = 'https://boulderlab.geyserdata.com'
access_key = 'AKIA47CR2UE7WGLJIRVP'
secret_key = 'qN8cbYbqf/bUMYIn4iZd3LKFs0Z8hLIrBWGaejW3'
download_file_from_s3(filename, bucket_name, endpoint_url, access_key, secret_key, download_path)
For example in order to download the file test.bin run:
python3 download_file_from_s3.py test.bin ./
Support contact
In the case of any questions, please send us an email to support@geyserdata.com